guides
Last update:02 February 2017
Towers locations
Tower 1 The first ctOS tower.
It’s located in the Parker Square district.
Tower 2 The second tower in Parker Square district located on elevation.
Tower 3 The third tower on the small island near the Mad Mile district.
Tower 4 The fourth tower in the north-west corner of Mad Mile district.
Tower 5 The fifth tower on the east from skyscrapers in ceneter of the district.
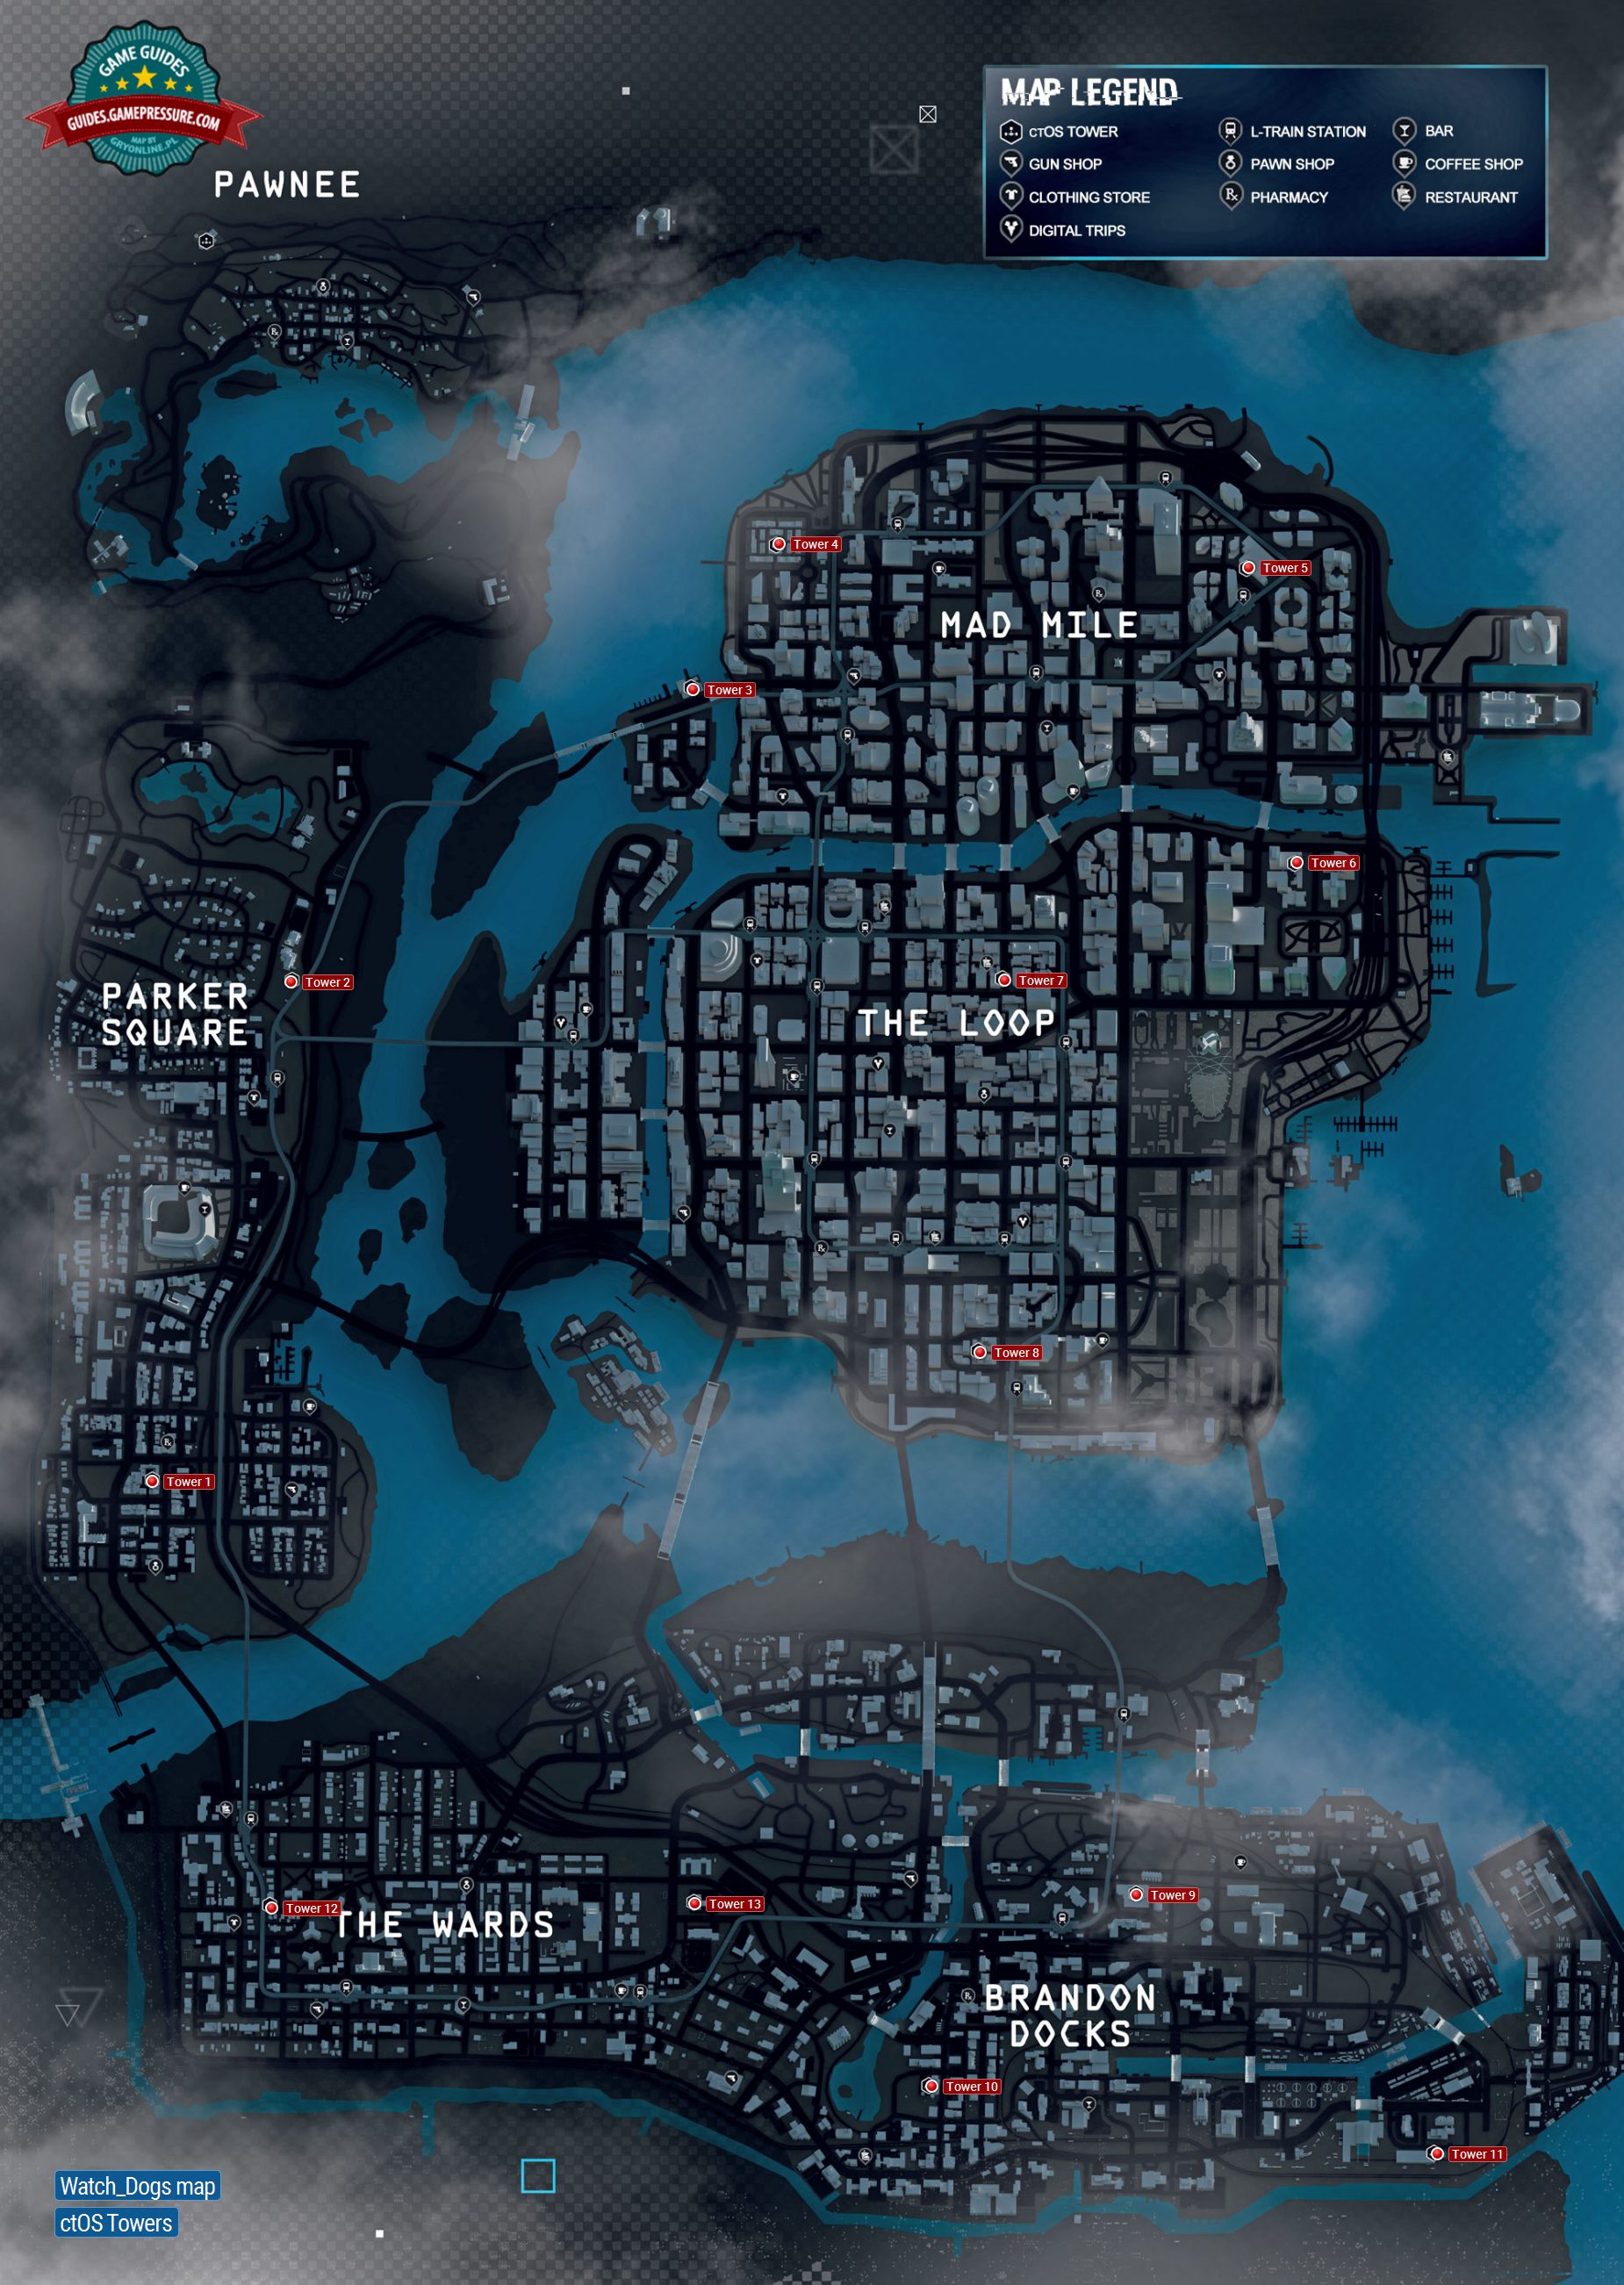
Tower 6 The sixth tower in the northern-east part of The Loop district.
Tower 7 The seventh tower in the northern part of The Loop.
Tower 8 The eighth tower in the southern part on The Loop district.
Tower 11 The 11th tower in the southern-east part of docks.
Tower 12 The 12th tower is located near the rails in the western part of The Wards.
Tower 13 The 13th tower is located in the center of The Wards district.
ctOS towers allow you to unlock hidden collectibles over a given area.
Unlocking them all is required for completing the game in 100%.
#1
The first tower is located near the first hideout.
Almost in each case, to dive into the terminal, you gotta enter the alley between buildings.
In this case, locate the yellow forklift, over which you enter the rooftop of the building.
Climb higher and walk onto the bridge.

Underneath, there is a blue elevator - activate it and walk onto the neighboring rooftop.
Then, climb higher.
At the very top, you will notice a blocked lock.
TO open it, just like in any other case, you gotta locate the lock’s activator.
The powering circuit is displayed after you activate the Profiler.
On the mast, there is a camera - hack into it.
The camera view will allow you to determine where the switch is.
At the back, you will find a camera attached to the wall.
The second camera is at the mast.
You cannot see it, until you lower the fork of the forklift that is in the way.
The view from the second camera allows you to activate the switch on the wall.
The view ahead will allow you to see the first switch.
To unlock the second one, you should walk around the building and find the second camera.
Then, walk into the Southern street, where you will notice a blue elevator.
Use it to gain access to the rooftop.

walk over it, up to the locked gate.
The second switch is in front of the gate on the left.
Walk over to the opposite side of the building, now.

To the right of the locked gate, there is a terminal on the wall.
Exit the view mode and climb to reach the gate.
Then, you’re able to hack into the tower.

#6
There is an easy way to reach the sixth mast.
Lower it and reach the rooftop.
ON the wall, behind the mast, there is a camera.

The view from that camera will allow you to activate the switch at the mast.
Then, locate the blue elevator.
Use the two cameras to pop swing open the passages.
Climb as high as possible, until you see a locked door.
There are two gates that it’s crucial that you open.
There also are two switches.
Find the camera that you will be able to hack into, on the Eastern side of the mast.
Deactivate the view and after you cross the door, climb up onto the mast.
At the last one, there is a camera - hack into it.
Use it to activate the first switch.
Walk over onto the rooftop of the neighboring building, using the blue elevator.
Then, walk over the bridge and approach the locked gate.
The switch is on the right side of the building, next to the gate.
#10
Accessing the next mast is very easy.
After you activate it, walk through the building and climb over the gate.
Climb higher, using the crane and get to the mast.
Secondly, you’re gonna wanna enter the car and drive it into the container ahead.
Thirdly, activate the crane and, when it lifts you, run up and smash the gate.
To get into the mast, you still need to walk through the gate and climb onto the ladder.
#12
Once you reach that tower, you better take the following steps.
Cross the street and climb up the stairs onto the rooftop of the neighboring building.
Then, walk over the tracks to the gate to the mast.
After you activate the mechanism, you’ve got the option to walk over to the mast.
#13
Climb onto the rooftop by taking the elevator (the blue one).
After you activate it, walk around the second annex and activate the mast.
This site is not associated with and/or endorsed by the Ubisoft or Ubisoft Studios.
All logos and images are copyrighted by their respective owners.
