There is a vent right next to it, use it.
There will be only one path in this vent.
Cross the bridge to the other side of the room.
After you fall, walk up to the first crate on the right and take the flare.
you might use it to light up your way (press Q and grab the flare).
Walk up to the gate shown in the screenshot and crouch to get to the other side.
Keep walking along the same path until you reach the place where you have to crouch again.
There is a button on the left, use it to kick off the gate.
Before you use the ladder, crouch and cross the second obstacle and you’ll find some useful materials.
Now you’re free to come back and enter the higher level.
Take more materials from the first room and walk through the door to the next one.
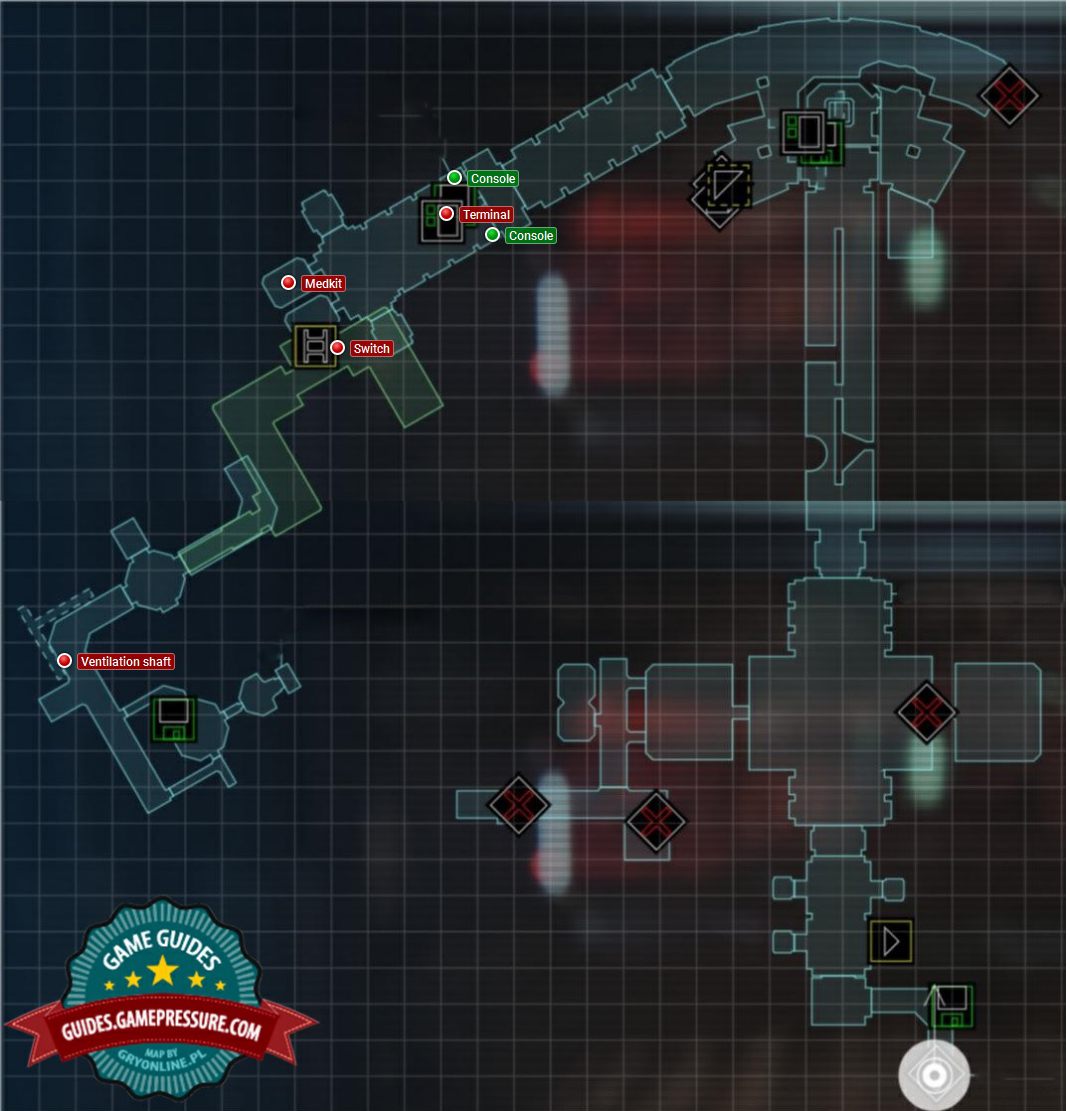
Keep walking along the corridor and you’ll reach four consoles (two on each side).
They will patch your map.
After you do it, your map will show areas that were hidden earlier.
To finish the action, use the terminal and select “restore power in departures”.
Before you go to the station, use the terminal where you’ll find two more journals.
One of them contains a pass code for a door that was locked before.
Go back to the room downstairs and you’ll find a closed door on the right.

You’ll find the code in the journals (0340).
The room on the right contains a blueprint of a medikit.
Pick it up and you’ll learn how to craft them (press Q and select crafting).
After you take the blueprint, go through the door you unlocked.
You’ll reach the place shown in the screenshot.
You’ll see a hanging wire.
It’s live, so you should crouch to avoid it.
Take the materials from the benches.
This site is not associated with and/or endorsed by the SEGA or Creative Assembly.
All logos and images are copyrighted by their respective owners.