Observation towers with searchlights.
Main road patrolled by enemy trucks.
Main roads leading up the hill.
Side path leading up the hill.
Area where you find documents on an enemy officer.
Exemplary ambush point on an enemy officer.
Western entrance to the fort (small passageway).
Central entrance to the fort (main gate).
Eastern entrance to the fort (scaffolding).
Area where you’re free to find an officer carrying a key.
Cell with an imprisoned informant.
Area where you find the Panzerschreck.
Courtyard where enemy reinforcements show up.
Ladder leading to the fort’s battlements.
Areas where the escaping informant makes his stops.
Area where during the final part of the mission enemy trucks continue to show up.
Aside from unlocking the nest it’s possible for you to also perform a Long Shot here.
War diary - Survival Notes: Sound-Masking.

War diary - Letters to Martin.
War diary - Missives from Home.
War diary - Survival Notes: Firemaking.
War diary - Axis Account: Vahlen’s Wrath.
War diary - Vahlen’s Journal: Dealing with Traitors.
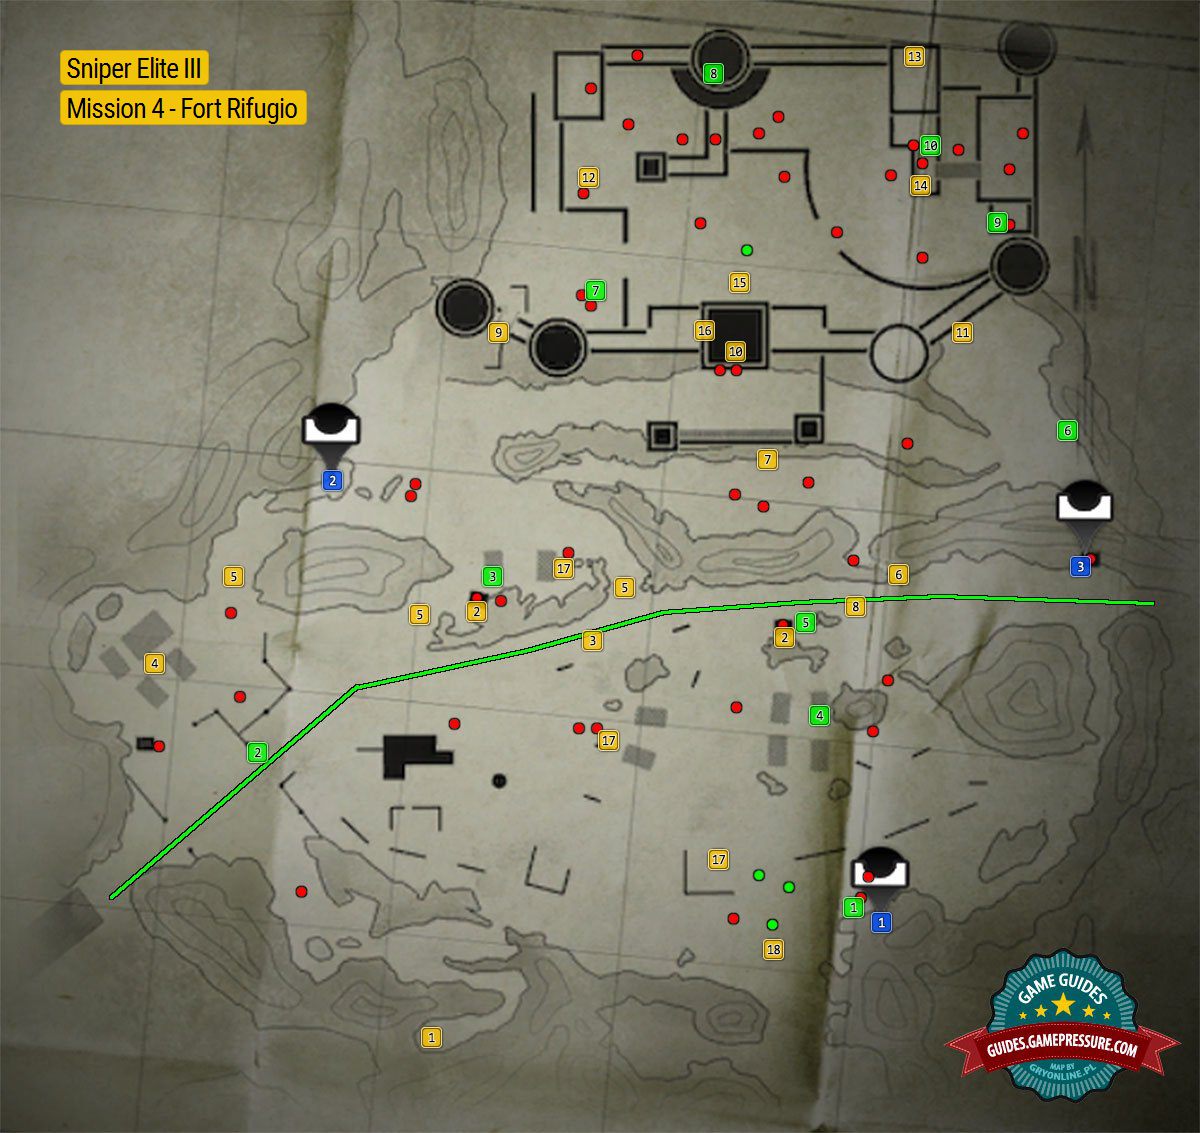
The picture above shows the map of the location, in which mission 4 takes place.
The most important places, like main paths, mission objectives or secrets, are marked on the map.
At the beginning, a sniper rifle will be enough to eliminate your enemies.
Later, a silenced weapon will be useful (e.g.
This site is not associated with and/or endorsed by the Rebellion or Rebellion.
All logos and images are copyrighted by their respective owners.