Generators which can be used to hide the noise when using a rifle.
Enemy inside a tent.
This person has a document with the information about the base.
Path leading to the first snipers nest.
Sniper nest which should be used to eliminate the first officer.
Location of the first officer.
Observation tower with the searchlight.
Campsite with the second officer.
Motorpool with five trucks which need to be destroyed.
Area where a truck with reinforcements shows up.
Suggested path leading to the third officer.
Location of the third officer.
Location of the fourth officer.
Suggested area where you should place a land mine.
Area where you end the mission.
Aside from unlocking the nest it’s possible for you to also perform a Long Shot here.
War diary (it’s carried by one of the enemies) - Intel: Officer Assignments.
War diary - Axis Account: Reclaiming Tobruk.

War diary - Discipline and Obedience.
War diary (it’s carried by one of the enemies) - Intel: Recruitment Drive.
War diary - Axis Account: Vahlen’s Presence.
War diary (it’s carried by one of the enemies) - Intel: Vahlen’s Project.
War diary - Axis Was Story: Tobruk’s Defense.
War diary (it’s carried by one of the enemies) - Intel: Threat Assessment.
War diary - Vahlen’s Journal: Welcome to Africa.
War diary - Survival Notes: Relocation.
War diary (it’s carried by one of the enemies) - Intel: Report for Reassignment.
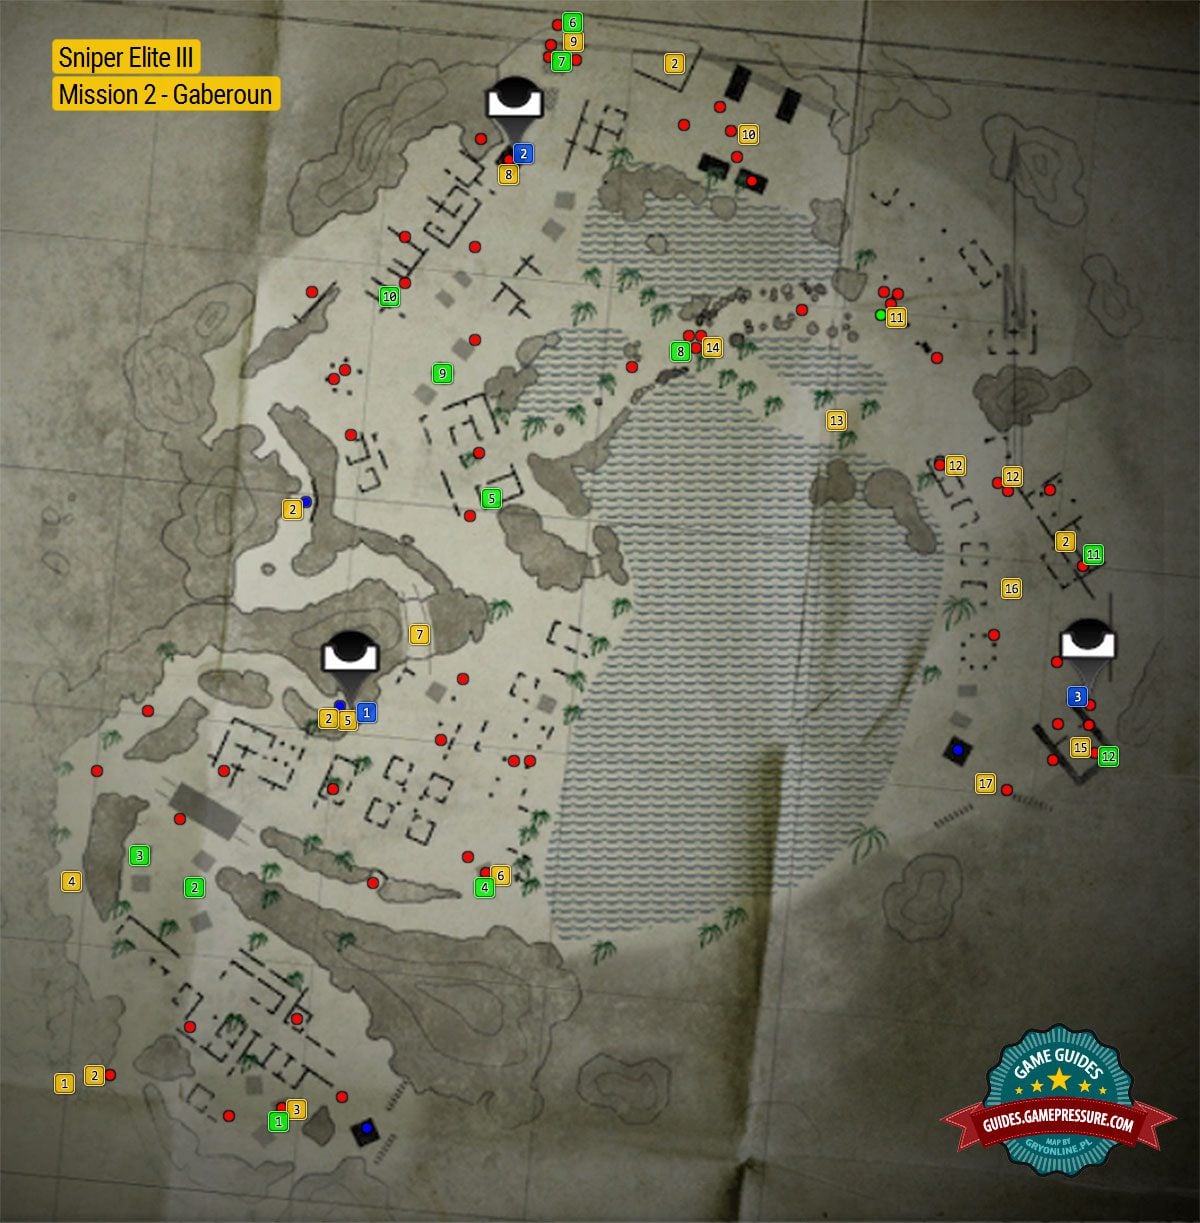
The above image presents a map of location, in which the second mission of the campaign takes place.
It’s the Gaberoun oasis and the surrounding ruins, and enemy encampments.
), as well as the location of collectibles (secrets).
This site is not associated with and/or endorsed by the Rebellion or Rebellion.
All logos and images are copyrighted by their respective owners.