Church’s side room.
There’s a typewriter here (plus some supplies).
Roof of the church.
Back of the church.
you’re able to activate the elevator by using a switch in (M4,5).
It travels between floors 1F and B2.
There’s a switch here which unlocks a new part of the corridor in (M4,7).
Room with a typewriter.A ladder which leads to floor B2 becomes available later on.
Room with a document and red chemicals.you might use a sterilizing agent later on to unlock the gas chamber.
The room can be unlocked using the Blue Leech Charm.There’s an Input Reg.
Room with zombies and a Green Leech Charm.
Coil here, as well as a lever which lowers a ladder to (M4,11).
you might also use a Hookshot to get to room (M4,20).
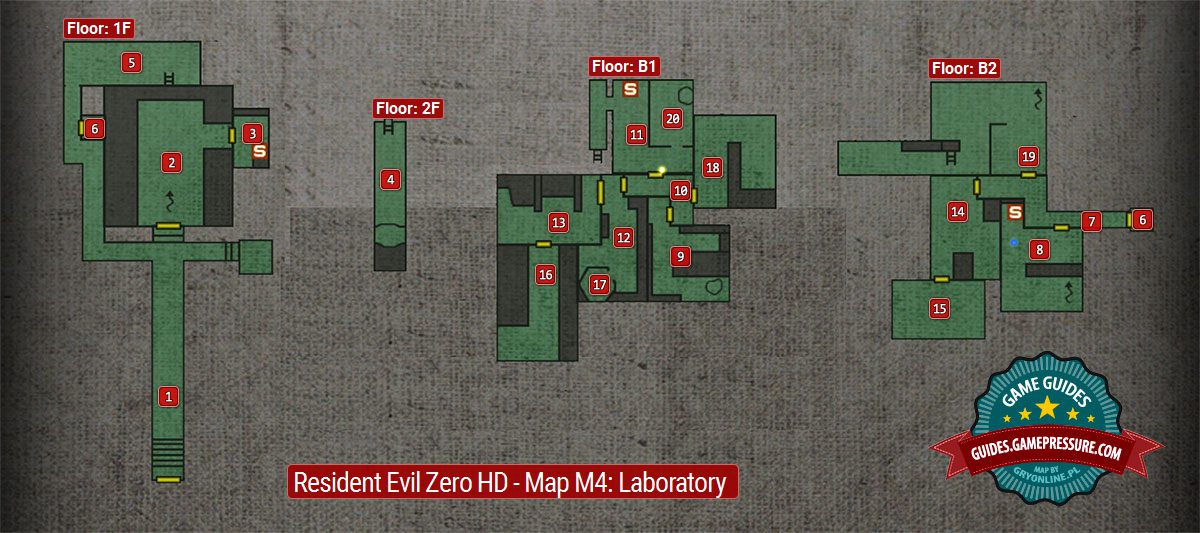
Above, it’s possible for you to see a map of the Laboratory.
The walkthrough describes the suggested order of exploration of the Laboratory.
You will also see references to the map in the text.
This site is not associated with and/or endorsed by the Capcom or Capcom.
All logos and images are copyrighted by their respective owners.