guides
Last update:11 May 2016
data pipe relays
Coventry 1 Above the entrance to the My Alibi club.
Coventry 5 Canopied area.
Coventry 6 Near the gate leading to the Blackgate prison.
The Bowery 1 To the left of the theater entrance.
The Bowery 3 Above The Wonder Expo gate.
The Bowery 4 Near a door leading to the bank.
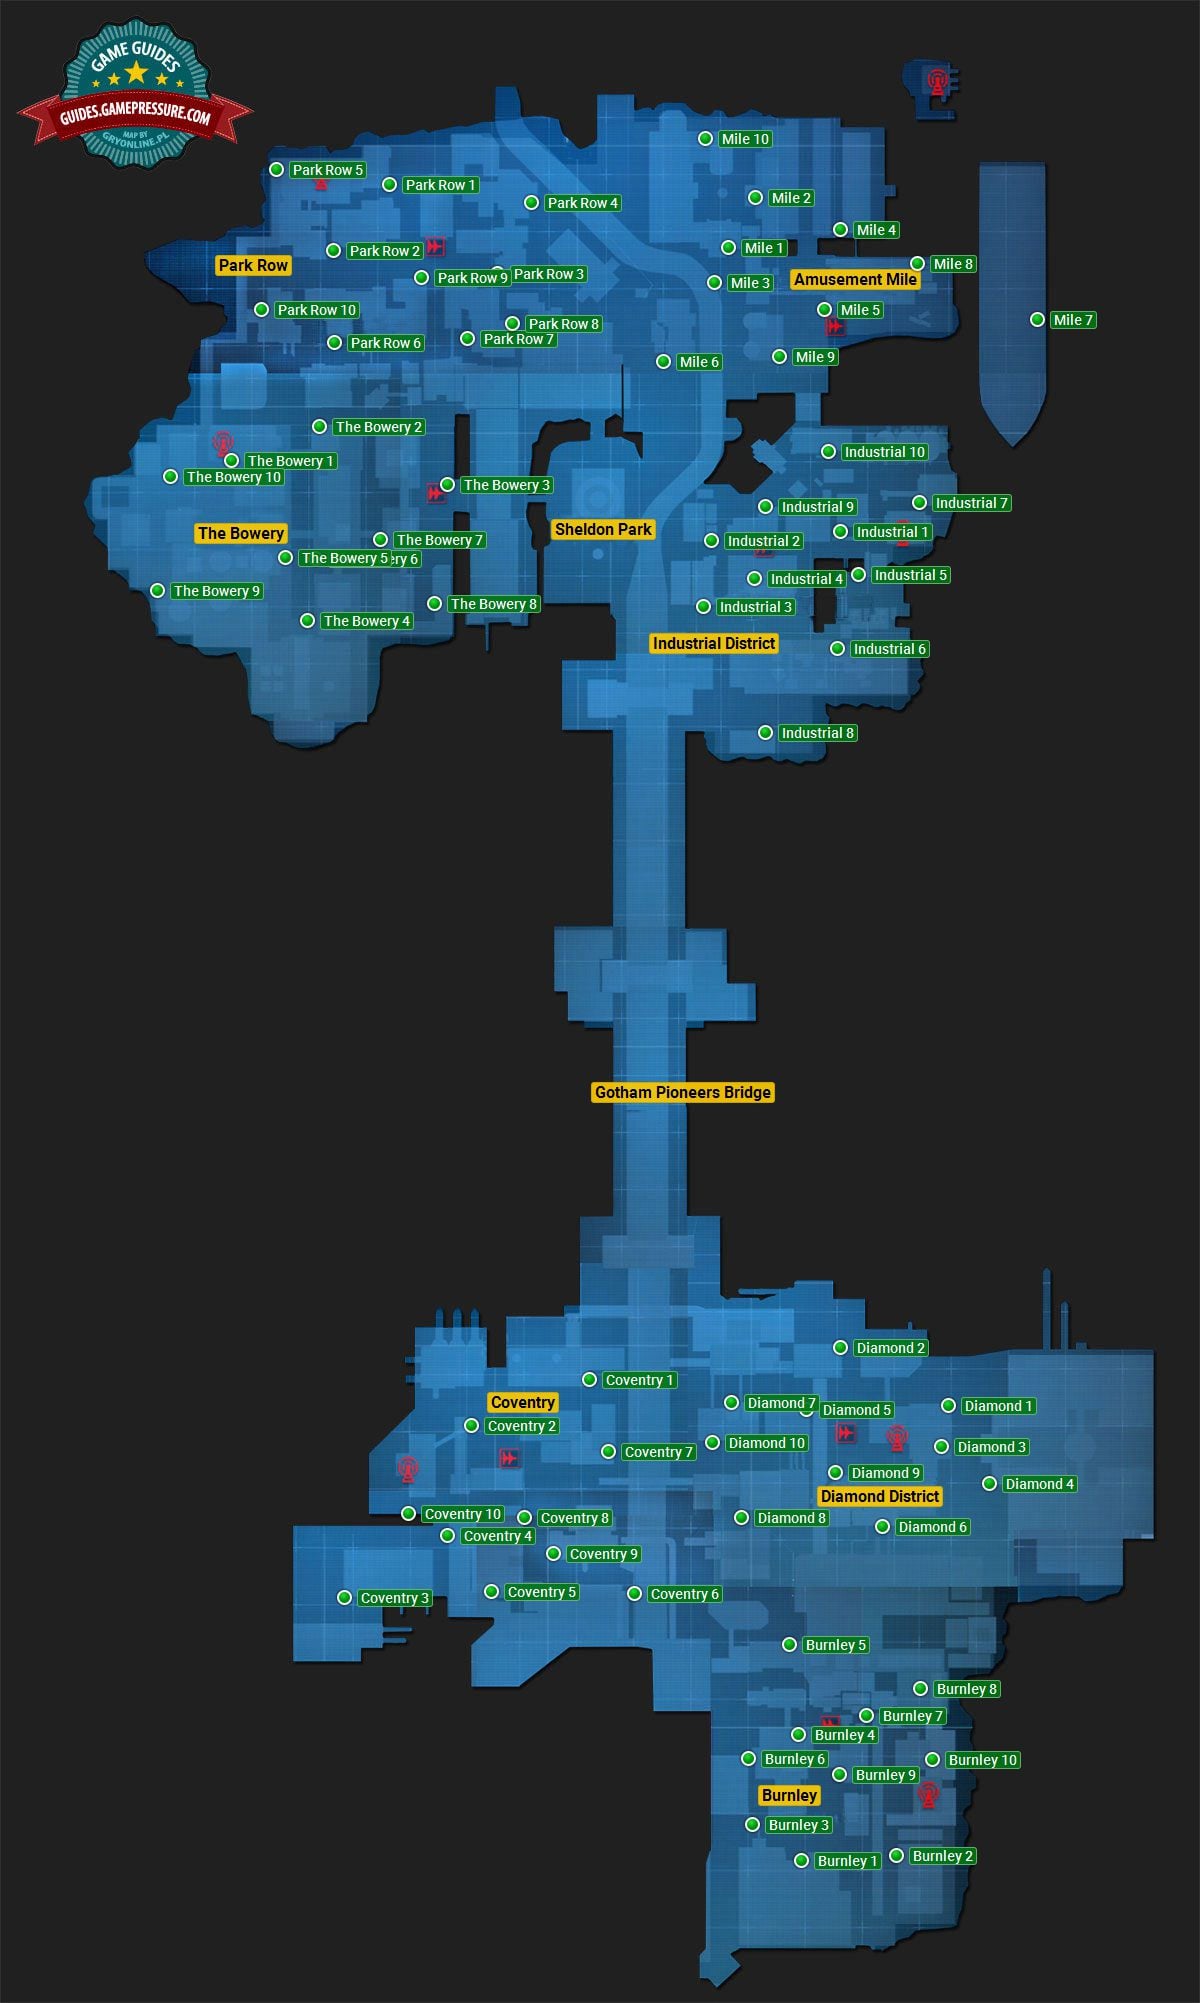
The Bowery 6 Canopied area, near an ATM.
The Bowery 7 Canopied area.
Park Row 7 Above the theater entrance.
Park Row 8 In a side alley.
Industrial 5 Next to a gate leading to the Sionis Steel Mill.
Industrial 6 Above a yellow metal balcony.
Burnley 1 Above the main entrance to the police station.
Burnley 8 On the building’s roof.
Diamond 3 On the building’s roof (the one with armed opponents).
Mile 1 Under a large balcony.
In each of the main city district, there are 10 online grid relays to destroy.
Note- do not worry if a group of relays temporarily disappears from the world map.

This is the manifestation of one of the minor glitches in the game.
If this is what happened, you’re free to still destroy the relays.
You will only have problems marking them as your destination on the world map.
After you reach each new relay, you better do the same thing, i.e.
select thebatarangfrom the inventory and use it to destroy Enigma’s equipment.
This site is not associated with and/or endorsed by the Warner Bros Interactive Entertainment or WB Games Montreal.
All logos and images are copyrighted by their respective owners.